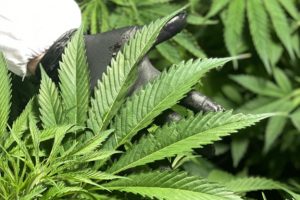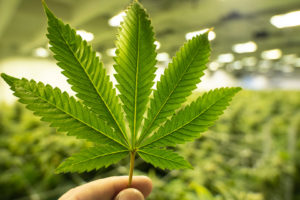

We’ve heard talk of Korean farming techniques used to grow excellent cannabis. With that in mind, we are bringing you an article from the Northeast Organic Farming Association of Massachusetts written by Julie Rawson.
Aaron Englander has developed a large body of knowledge regarding Korean Natural Farming. KNF looks very holistically at the entire farm system, including the people in it, and uses inputs that are generally close at hand and relatively inexpensive.
The natural farming movement grew in the Far East, while a similar pattern was developing with the organic movement in Europe and America. Both of these “movements” came about out of a response to the Green Revolution and the heavy move toward chemically based agriculture in the 1940’s worldwide. Over the span of the 7 hour day, about 22 of us learned many of the recipes used in KNF for enhanced farm production through conversation, power point, mutual sharing, and, most importantly, hands on demonstrations. Many thanks to Linda Ugelow who pushed the idea of inviting Aaron in the first place and has been doing a lot of experimentation. She helped a lot during the day, and brought a few completed recipes to help with demonstrations. Korean Natural Farming recognizes three general stages in plant development, and has developed recipes for products for each of these stages. For the nutritional growth vegetative stage, FAA, FPJ, LAB, and OHN are appropriate to use. For the changeover period (when the plant is in “puberty”), the go-to recipes are LAB, OHN, WCaP, and FFJ. And in the full on reproductive stage, it is advisable to use LAB, WCA, and OHN. Here are most of the basic recipes and their abbreviations:
Fermented Plant Juice – FPJ At dawn, collect the “meristem” – undifferentiated plant growing tips that are super full of energy. Pack layers of plant material (nettles, comfrey, purslane, mugwort, or other vibrantly growing plants) at a 1:1 ratio with sugar by volume in the appropriate sized jar of your choice, filling only 2/3 full for proper air circulation. As with all recipes of this packing nature, it is important to leave the headspace at the top for adequate oxygenation. Affix a paper towel with a canning lid ring or rubber band and let this product sit for approximately one week at room temperature. Pour off the liquid and reserve. You can creatively use the liquefied vegetative residue on the farm. When using FPJ, and all the following recipes, dilute to 500:1 (water to FPJ) for use on soil and 1000:1 for use as a foliar. And brew all these recipes at room temperature. In darkness or low light is best. For final storage, the 50-degree range is ideal.
Lactic Acid Bacteria – LAB Soak one cup of rice in water for at least five minutes, stirring the rice to release carbohydrates. Pour off and reserve the rice wash water. Let it settle for 3-5 days and then strain. At a 10:1 ratio, milk to rice wash water, mix these two ingredients into a glass jar filled 2/3 full and cap as before with a paper towel and a canning ring or rubber band. Let sit 5-10 days (depending on time of year) at room temperature until the liquid separates from the solids. Draw off and reserve this liquid and store the LAB as above.
Fish Amino Acids – FAA Kudos to Jane Hammer who hacked up the fish waste that Karen Masterson had brought to us from Twin Seafood. For this we used a 5-gallon pail and layered the fish 1:1 with sugar again (we used about 10 lbs of sugar), put a rock on it for a while, and came back and added some hay in the 1/3 pail headspace.
Aaron suggests to then put the lid on the pail loosely, bungee it shut to keep animals out, and let it sit for 3 months. Your homemade fish hydrolate will then be ready for use as FAA. Pour it off and store. Aaron suggests that this product sprayed on the soil 1-2 weeks before planting at a 500:1 dilution will prepare the soil well for planting. The FAA input can also be used similarly to a fish emulsion product, applied as foliar feed at a 1:1000 dilution in water.
Indigenous Micro-Organism – IMO #1 Soak 1 cup of rice for 24 hours and save the liquid for LAB. Cook the rice until it is done (2:1 water to rice), but not mushy nor dry. Fill a wicker basket 2/3 full with the rice and wrap it in an old t-shirt. Then either bury the basket beneath an old growth tree that is 500 meters higher than you are, according to Han-Kyu Cho (the father of this process), or bury your treasure in a barrel of mixed, half-cooked compost/leaf mulch about 1 foot deep (perhaps in a 30 gallon container). IMO #1 is probably the trickiest of the preparations, because what you want is for the rice to be covered (in 4-5 days) in white mold with no more than 25% of other colored molds. If the product is more than 25% colored molds, or if it goes too long and collapses, discard it and try again. Here are some trouble-shooting concerns: is the rice properly cooked, do you have the right temperature for the incubation period (not too hot or cold), and do you have the proper moisture level of the medium surrounding the IMO? The finished IMO #1 must be mixed with sugar immediately to stabilize it. See IMO #2 below.
Indigenous Micro-Organism – IMO #2 Mix well 1:1 IMO #1 to sugar. Put into jar 2/3 full; cover as with other preparations, and let sit at room temperature for a week. When it is done, Nigel Palmer stores his in the refrigerator indefinitely. He also uses this as a seed soak prior to planting seeds at 1000:1 ratio water to IMO #2.
Here is another tip from Nigel: when weeding, he puts the weeds, roots and all, in a 5 gallon bucket of water and lets them sit for 1-2 days. While the digestion of the weeds is still aerobic, he then strains the mixture and adds it to his foliar spray tank. Indigenous Micro-Organism – IMO #3 & #4 Next we went out to Liz Joseph’s compost pile and proceeded with IMO #3 production. We filled three 5-gallon buckets with water and added to each 2T IMO #2, 2T FAA, 2T FPJ, 1T OHN, 2T WCa (or you could add 2 T apple cider or brown rice vinegar), 2T LAB, a pinch of sea salt, 2T of beer (or you can use rice wine). Then we poured out 150 lbs of wheat bran on the bare soil and slowly added the 15 gallons of liquid while mixing. We ended up adding 2-3 more gallons of water and thoroughly mixed it. We covered it with the paper wheat bran bags (you could use a breathable tarp or straw beach mats) and left it. The pile needs to heat up to 140 degrees and then be turned regularly until it comes back down to around 80 degrees, which takes 7-10 days depending on the weather (faster or slower in warmer or cooler temps, respectively). A compost thermometer is a good investment here. At that point, Liz will add in an equal amount of soil to the bran compost/IMO #3 (and any water to get it to 60% hydration) and let it compost again, getting to 140 degrees, turning it and finishing it. You can add humates, kelp, rock dust and other goodies when you add the soil. This finished product, known as IMO #4, can be stored in plastic mesh bags until it is needed. If over winter, or if it dries out, hydrate before use as preplant, side dress (carefully and best under mulch), as a potting mix component, around fruit trees, or brewed and used in a foliar, etc. Fresh weight application rate is 1500-2000 lbs./acre or 35-45 lbs./1000 sq ft, similar to a lightly spread compost.
Water-soluble calcium – WCa Fry up some crushed eggshells until golden brown (no, don’t use any butter or salt!) and with a 10:1 apple cider vinegar to eggshells ratio, place in a jar 2/3 full, covered as before. It will bubble for about a week as the vinegar extracts the calcium into solution. Strain off the liquid and reserve. You have WCa! Watersoluble calcium hosphate – WCaP Linda showed us her nicely charred bones – beef bones in aluminum foil left in the wood stove for awhile, as well as pork bones and chicken bones baked at 300 degrees in a toaster oven for 4 hours. Then she put them in a bowl and crushed them with a rock. As before with the WCa, 10:1 vinegar to bones for 1 week should do the trick. Voila – WCaP.
Oriental Herbal Nutrient – OHN First Aaron passed around his jar of OHN and we all had a swig. Mood enhanced, as we were, we proceeded to make some. The herbal ingredients are equal parts garlic, ginger, cinnamon bark, and licorice root and 2 parts angelica root. Keep them separate and crush them. Fill the cinnamon bark, licorice and angelica containers 1/3 full (angelica container will have double the size of the others). Add beer or wine to cover and rehydrate the dry ingredients. Cover as above and let soak for 1-2 days. At this juncture, add sugar 1:1 to all five ingredients (still in their separate jars). Let ferment for 4-5 days, covering jars. Then top off each jar with vodka and cover. Stir every day for two weeks. When complete, strain all ingredients and mix for final storage.
Aaron suggests getting a copy of Agriculture Materials, by Han-Kyu Cho, as a handbook for this technique. He warns that the translation can be challenging, but that Cho is the father and the go to person of this process. Other good resources include the Hawaiian Natural Farming website (www.naturalfarminghawaii.net) and The Unconventional Farmer (www.gilcarandang.com). What a cool guy is Aaron Englander – a fully humble teacher who lowered his price twice to help us out financially on this event and shared what he had to offer with a complete spirit of generosity. And of course we had lots of fun – an important aspect of the tenets of Korean Natural Farming.
While not all of these techniques have been approved by Health Canada, there is no reason why the may not be in the future, given that Korean farming focuses on a natural approach.